To quickly fix a lawn sprinkler system:
1. Identify the problem (such as leaks, broken heads, or low pressure).
2. Shut off the water and electricity to the system.
3. Replace or clean affected parts (sprinkler heads, valves, solenoids).
4. Test the system to ensure proper function.
Having a well-maintained lawn sprinkler system is crucial for keeping your grass lush and green. Proper maintenance ensures the sprinklers work efficiently, saving you time, water, and money. A sprinkler system that doesn’t work correctly can lead to overwatering, dry patches, and wasted water.
I’m Scott McLeod, owner of McLeod Landscaping. With over 30 years of experience, I’m here to help you fix your lawn sprinkler system efficiently. This guide will cover everything from identifying common issues to step-by-step repair instructions.

Knowing what’s wrong with your sprinkler system is the first step to fixing it. Here are some common problems you might encounter:
Leaks can cause soggy spots in your yard and waste water. Look for signs like lower water pressure or water seeping up from the ground around your sprinkler heads.
Tip: If you see muddy or soggy areas, you likely have a leak. Turn off your system and inspect the area.
If your sprinklers aren’t spraying water as far or as high as they should, you might have low water pressure. This can be due to partially closed valves, a damaged pressure regulator, or even a water main issue.
Tip: Start by checking all valves to ensure they are fully open.
Sprinkler heads can get damaged by foot traffic or lawn mowers. A broken head might leak water or not spray at all.
Tip: If you notice a sprinkler head that isn’t popping up or is spraying water unevenly, it’s time to replace it.
Valves control the flow of water to your sprinkler heads. A faulty valve might leak or not close properly, causing water to continue flowing even after the system is off.
Tip: If you see a muddy spot or a sprinkler that doesn’t work, the valve might be the issue.
Electrical issues can cause your sprinklers to not turn on or to run continuously. This might be due to a faulty solenoid or damaged wiring.
Tip: Check the controller and wiring connections. If the controller seems fine, inspect the solenoid and replace it if necessary.
Cracked or damaged pipes can lead to constant leaks or low pressure. This is often caused by tree roots or ground movement.
Tip: If you notice leaks near tree roots or large wet areas, dig carefully to inspect the pipes. Replace any damaged sections.
By identifying these common issues, you can take the necessary steps to fix your lawn sprinkler system and keep your lawn healthy and green. In the next section, we’ll walk you through step-by-step instructions on how to tackle these problems.
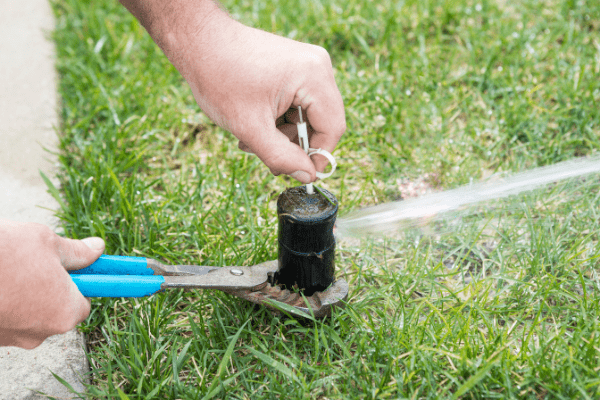
Digging: Start by digging around the broken sprinkler head to expose the riser. Be careful not to damage any nearby pipes.
Unscrewing: Unscrew the damaged sprinkler head from the riser. You can usually do this by hand, but if it’s stuck, use slip joint pliers.
Installing New Head: Install the new sprinkler head by screwing it onto the riser. Tighten it by hand to ensure a snug fit.

Tip: Always call 811 before digging to locate underground utility lines.
Disassembly: Unscrew the top of the sprinkler head to access the internal components.
Cleaning: Rinse the head and screen basket in a bucket of water to remove any dirt or debris.
Adjusting: Adjust the watering range of the sprinkler head before reinstalling it. Make final adjustments with the water running.
Low Water Pressure: If you notice low water pressure, check the valves on the backflow device.
Opening Valves: Ensure the valve on the horizontal pipe is open first, followed by the vertical pipe valve.
System Shutdown: Turn off the sprinkler system at the controller before making any repairs.
Cutting Damaged Section: Cut out the damaged section of the water line using a hacksaw.
Slip Coupling: Place a clamp on one end of the line, insert a slip coupling, and tighten the clamp. Repeat for the other end.
Locating Damage: Dig along the water line to find the damaged section. Start near trees if the line runs close to them.
Cutting: Use a hacksaw to cut out the damaged section.
Rerouting: If tree roots caused the damage, dig a new trench away from the tree.
Replacing Pipe: Cut a new section of pipe and connect it with regular couplings and band clamps.
Zone Testing: If a zone isn’t turning on, you might have an electrical problem.
Voltage Testing: Use a multimeter to test the voltage at the controller. Place one lead on the common terminal (marked “c” or “com”) and the other on the nonworking zone’s terminal.
Controller Check: Refer to your owner’s manual to ensure the voltage reading is within the required range (usually 24 to 28 volts). If not, replace the controller.
Disconnecting Wires: Remove the wire nuts or cut the wires connecting the faulty solenoid to the control valve.
Unscrewing Old Solenoid: Unscrew the defective solenoid counterclockwise.
Installing New Solenoid: Insert the new solenoid, reconnect the wires, and hand screw it in tightly.
Waterproof Connectors: Use waterproof wire connectors to reattach the wires. This will prevent any future electrical issues.
Testing Resistance: Test the resistance of the new connections to ensure they are secure.
By following these steps, you can effectively fix your lawn sprinkler system and ensure it operates smoothly. Next, we’ll discuss some DIY maintenance tips to keep your system in top shape.
Regular maintenance can save you time and money by preventing problems before they start. Here are some simple DIY sprinkler system maintenance tips to keep your lawn lush and green.
Monthly Inspections: Inspect your sprinkler system once a month. Look for signs of leaks, broken heads, or low pressure. Catching issues early can prevent bigger problems.
Test Each Zone: Run each zone for a few minutes to ensure all heads are working properly. Listen for unusual noises that could indicate a problem.
Remove Debris: Sprinkler heads can get clogged with dirt, grass, and debris. Turn off the system and remove the heads. Rinse them under water to clear out any blockages.
Check Seals: Inspect the rubber seals for wear and tear. Damaged seals can cause leaks. Replace any worn seals to prevent water waste.
Check Spray Patterns: Make sure your sprinkler heads are covering the intended areas. Adjust the spray patterns to avoid overspraying onto sidewalks or driveways.
Adjust Flow Rate: If some areas are getting too much or too little water, adjust the flow rate on the sprinkler heads. This ensures even watering across your lawn.
Winterize Your System: Before the first freeze, shut off the water supply and drain the system. This prevents pipes from freezing and bursting.
Spring Start-Up: In the spring, turn the water back on slowly to avoid pressure surges. Check each zone and head to ensure everything is working properly.
Summer Checks: During the hot months, make sure your system is providing enough water. Adjust watering schedules to meet the increased demand.
By following these DIY maintenance tips, you can keep your sprinkler system running smoothly and prevent costly repairs. Next, we’ll answer some frequently asked questions about lawn sprinkler systems.
The cost to fix a lawn sprinkler system can vary widely based on the type and extent of the damage. On average, homeowners spend around $270. However, simple repairs like replacing a sprinkler head might cost as little as $50, while more complex issues, such as fixing broken pipes, can reach up to $850.
For example, if you need to replace a gear-driven sprinkler head, it might cost between $10 and $20. On the other hand, repairing a valve box could set you back $20 to $90. Always consider getting a professional assessment to get an accurate estimate based on your specific situation. Source
Whether you should repair your sprinkler system yourself or hire a professional depends on your comfort level and the complexity of the problem. Basic repairs, such as replacing a sprinkler head or cleaning a clogged nozzle, can often be done by homeowners with some basic tools and a little guidance.
However, more complex issues, like fixing electrical problems or repairing damaged pipes, might require professional help. Labor costs can add up quickly, but hiring a professional ensures the job is done correctly and efficiently. For example, a homeowner shared that fixing a cracked PVC pipe themselves cost about $11, but hiring someone would have been at least $200 due to labor. Source
Regular maintenance is key to keeping your sprinkler system in top shape and avoiding costly repairs. Here’s a simple schedule to follow:
By performing these checks, you can prolong the life of your sprinkler system and ensure it operates efficiently year-round. Source
Next, let’s wrap up with some final thoughts and when to call in the professionals.
Regular maintenance of your lawn sprinkler system is crucial for keeping your lawn lush and green. By performing routine checks and addressing issues early, you can avoid costly repairs and ensure your system operates efficiently year-round.
Regular maintenance helps:
While many sprinkler system repairs can be done yourself, there are times when it’s best to call in a professional. Consider professional help if:
At McLeod Landscaping, we specialize in lawn sprinkler system installations, repairs, and maintenance. Our team of experts can quickly diagnose and fix any issues, ensuring your system runs smoothly. Whether you need a simple repair or a complete system overhaul, we’re here to help.
Contact us today to schedule a consultation and keep your lawn looking its best!
Contact McLeod Landscaping today at (978) 640-0957 or click here to schedule a consultation for retaining wall installation. Let our experienced team design and install a functional and visually appealing retaining wall that enhances your landscape.
1881 Main St Unit 1, Tewksbury, MA 01876