
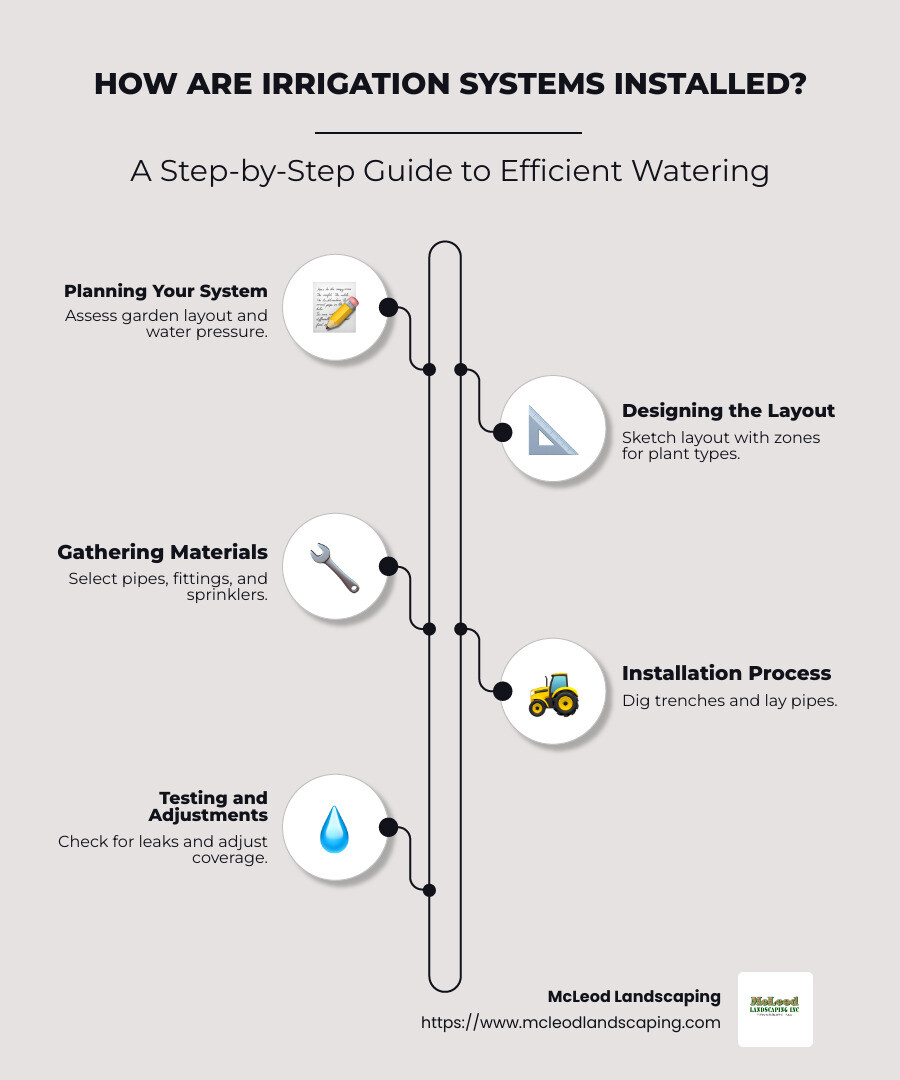
How are irrigation systems installed? The process begins with understanding your garden’s watering needs, assessing the garden layout, and determining the water source and pressure. Next, design your system layout with zones for various plant types, and select the appropriate materials like pipes, fittings, and sprinklers. After gathering the necessary tools, you’ll execute a step-by-step installation: digging trenches, laying pipes, and installing emitters, before connecting everything to the water source and conducting tests to ensure proper functionality.
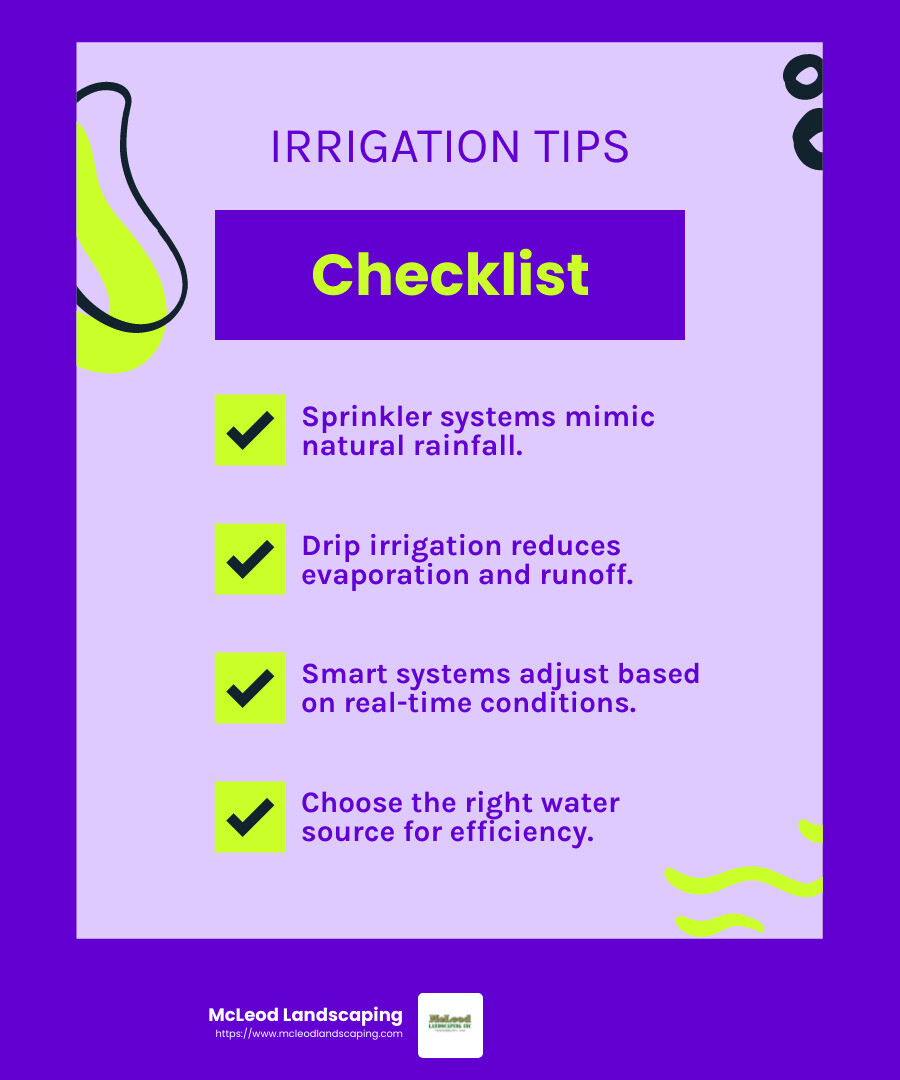
Introducing smart irrigation solutions can revolutionize garden care, offering benefits like consistent watering, improved plant health, and significant water conservation. These systems use technology to adjust watering based on real-time weather conditions, ensuring your garden gets exactly what it needs while minimizing waste. As droughts and water scarcity become more common, conserving water is not just environmentally responsible but also cost-effective.
As the owner of McLeod Landscaping, I’m Scott McLeod, with over 30 years of experience in landscaping and irrigation installations. We’ve seen how irrigation systems improve property aesthetics and sustainability. Ready to dive deeper into how are irrigation systems installed? Let’s explore the benefits and techniques that make this process both straightforward and rewarding.
Glossary for how are irrigation systems installed:
– how to install a drip irrigation system
– how to install a sprinkler system
– how to install drip irrigation system for vegetable garden
When it comes to keeping your garden lush and healthy, understanding irrigation systems is key. There are different types of systems, each catering to specific needs and landscapes. Here’s a breakdown:
Choosing the right water source is crucial for an efficient system. Common options include:
Different plants have different water needs. Understanding these is essential for effective irrigation:
Grouping plants with similar water needs together can make your irrigation system more efficient. This approach helps conserve water and ensures that each plant thrives.
By understanding these elements, you can tailor an irrigation system that meets your garden’s specific requirements. Next, we’ll dig into the planning and design process to set up your system effectively.
Before you dig in, planning your irrigation system is crucial. A well-thought-out plan saves time, effort, and water.
Garden Assessment
Start by assessing your garden. Measure the area and note key features like flower beds, lawns, and trees. Group plants with similar water needs together. This makes irrigation more efficient and conserves water.
Water Pressure Check
Next, check your water pressure. Use a pressure gauge to measure it at your water source. This step is vital because it helps you select the right components and ensures your system operates smoothly.
With your garden assessment and water pressure data in hand, it’s time to design your layout.
Sketching
Create a sketch of your garden. Use graph paper or a garden planning app to plot the layout. Mark existing features and plan where pipes and emitters will go. A clear sketch helps visualize the system and minimizes errors during installation.
Emitter Placement
Decide on emitter placement based on plant needs. For sprinklers, ensure head-to-head coverage to avoid dry spots. For drip emitters, place them close to plant roots. Proper placement ensures efficient water distribution.
Zone Planning
Divide your garden into zones. Each zone should have plants with similar water needs. This allows you to control watering schedules more effectively. For example, lawns might need daily watering, while flower beds might only need water every few days.
Zoning Considerations
Consider landscape features like slopes and sun exposure. Water pressure changes with elevation, so plan zones accordingly. Also, note shaded areas, as they may require less water than sunny spots.
By carefully planning your system and designing an efficient layout, you’re setting the groundwork for a successful irrigation installation. Next, we’ll guide you through the step-by-step installation process.
To start installing your irrigation system, you need to connect to a reliable water source. This involves a few key steps:
1. Backflow Preventer and Shut-Off Valve
First, identify your water source, such as an outdoor tap or a rainwater collection system. Install a backflow preventer to keep contaminated water from flowing back into your clean supply. This is crucial for maintaining water quality. Right after the backflow preventer, install a shut-off valve. This allows you to control the irrigation system separately from your main water supply.
2. Trenching and Pipe Laying
The next step is trenching. Use a trenching tool or shovel to dig trenches about 6 to 12 inches deep. This depth protects pipes from damage and freezing. Lay the main line (the primary pipe) in these trenches, running it from the water source to the areas you plan to irrigate. Polyvinyl chloride (PVC) or polyethylene pipes are common choices, with PVC being more rigid and polyethylene more flexible.
Once the main line is in place, it’s time to install the components that will deliver water to your plants.
3. Valve Installation
Valves are essential for controlling water flow to different zones in your garden. Install them at strategic points along the main line. Use T-connectors to branch out lateral lines from the main line to each zone. This setup allows you to manage water distribution efficiently.
4. Sprinkler Heads and Drip Emitters
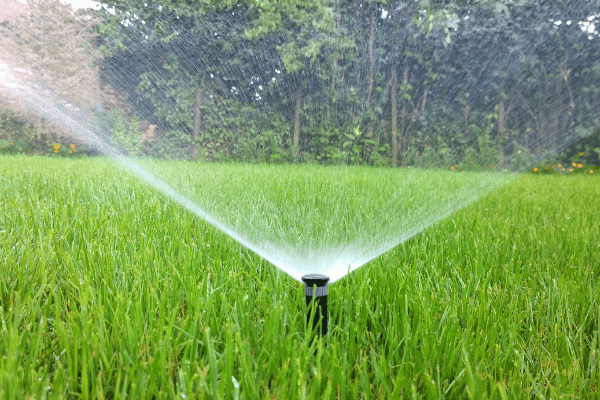
For areas like lawns, install sprinkler heads along the lateral lines. Choose the right type based on your garden’s needs, such as pop-up or rotary sprinklers. Ensure proper spacing to achieve head-to-head coverage, minimizing dry spots.
For flower beds or vegetable gardens, drip emitters are ideal. Place them close to the plant roots to provide water directly where it’s needed. This method reduces water wastage and ensures plants receive adequate hydration.
5. Coverage Testing
After installing the sprinklers and drip emitters, test the system. Turn on the water supply and check for leaks. Adjust the sprinkler heads for optimal coverage and ensure drip emitters are functioning correctly. Make any necessary adjustments to achieve uniform water distribution across your garden.

By following these steps, you can install a robust irrigation system that meets your garden’s needs. In the next section, we’ll explore how to test and adjust your system to ensure it’s running efficiently.
Once your irrigation system is installed, it’s crucial to ensure everything works perfectly. This means checking for leaks, testing coverage, and making necessary adjustments. Let’s explore these steps.
Start by turning on the water supply. Carefully inspect all connections, pipes, and emitters for any signs of leaks. A small leak can waste a lot of water over time, so it’s important to catch these early.
Common leak signs include:
If you find a leak, tighten the connections or replace any faulty parts. Applying thread seal tape can help secure threaded joints and stop leaks.
Once you’re sure there are no leaks, it’s time to test the coverage. This step ensures that water reaches all parts of your garden evenly.
For sprinkler systems:
For drip systems:
After testing, you might need to make some adjustments to optimize your system’s performance.
Sprinkler Adjustments:
Drip System Adjustments:
Run the system through a full cycle after making adjustments to ensure everything is working as it should. Regular monitoring and tweaking will keep your irrigation system efficient and your garden thriving.
In the next section, we’ll discuss maintenance tips to help your irrigation system last for years to come.
Keeping your irrigation system in top shape is key to enjoying a lush, green garden year after year. Let’s explore some essential maintenance practices that will help extend the life of your system.
Regular inspections are crucial. Perform these checks at least once a season, especially at the start and end of the growing season.
Keeping your system clean ensures it runs smoothly.
Winterizing your system is essential if you live in a region with cold winters. This process prevents pipes from freezing and bursting.
Regular monitoring and maintenance will keep your irrigation system efficient and reliable. By following these tips, you’ll save water, reduce repair costs, and enjoy a healthy, vibrant garden.
In the next section, we’ll answer some frequently asked questions about irrigation systems.
Irrigation lines should be installed at a depth of 6 to 12 inches. This depth helps protect the lines from damage and freezing, especially in colder climates. For optimal protection, consider local climate conditions and the type of irrigation system being used.
The time it takes to install an irrigation system can vary based on the size and complexity of the project. For a small, straightforward lawn, installation might take a weekend if you’re doing it yourself. Larger or more complex systems, especially those requiring professional installation, can take several days. Factors such as terrain, soil type, and weather conditions can also affect the timeline.
The cost of installing a lawn irrigation system ranges widely. A simple, do-it-yourself setup can be as low as $500. However, for larger lawns or more sophisticated systems, professional installation can cost $5,000 or more. The total cost will depend on the system’s size, the complexity of the design, and the specific components used. Always consider your budget and the long-term savings on water bills when planning your system.
In the next section, we’ll conclude with the benefits of professional installation and how McLeod Landscaping can help you create the perfect irrigation system for your needs.
Choosing to install an irrigation system is a smart investment for your landscape. It ensures your plants receive the right amount of water, conserving this precious resource while keeping your garden lush and green. However, the installation process can be complex, requiring careful planning and precise execution.
This is where professional help can make a world of difference. At McLeod Landscaping, we bring over 30 years of experience to the table. Our team understands the nuances of designing and installing efficient irrigation systems custom to your property’s unique needs. Whether you’re a homeowner or manage a commercial landscape, we have the expertise to ensure your system is both effective and economical.
Benefits of Professional Installation:
By choosing McLeod Landscaping, you’re not just installing an irrigation system; you’re investing in a hassle-free, sustainable future for your landscape. Let us help you achieve the perfect balance of beauty and efficiency in your garden.
For more information on our services or to schedule a consultation, visit our Irrigation System Services page. We look forward to helping you create a vibrant, thriving landscape.
Contact McLeod Landscaping today at (978) 640-0957 or click here to schedule a consultation for retaining wall installation. Let our experienced team design and install a functional and visually appealing retaining wall that enhances your landscape.
1881 Main St Unit 1, Tewksbury, MA 01876