If you’re wondering how to install drip irrigation system for vegetable garden, you’re in the right place. We’ll break down everything you need to know in simple, clear steps.
But first, here’s the quick answer:
A properly installed drip irrigation system brings a host of benefits to your garden. It’s efficient, reducing water waste by delivering it directly where needed — the root zones of your plants. You avoid over-spraying pathways, evaporative loss, and unnecessary foliage wetting. Plus, because water is applied slowly, it seeps deep into the soil, promoting healthy root growth with no runoff.
A drip irrigation system also allows you to water your garden without the drudgery of manual watering. With an automatic timer, you can set it and forget it, freeing yourself to enjoy your garden, not slave over it.
I’m Scott McLeod, owner of McLeod Landscaping with over three decades of experience. I’ve helped countless homeowners install efficient and effective drip irrigation systems, enhancing their plant health and water conservation efforts. Our team at McLeod Landscaping specializes in custom irrigation solutions custom to your garden’s specific needs.
Ready to make your vegetable garden thrive? Let’s dive into the details.
Drip irrigation is a game-changer for vegetable gardens. It delivers water directly to the plant roots, ensuring efficient use and minimal waste. Let’s break down the key components and considerations.
A drip irrigation system consists of several essential parts:
Drip irrigation systems come in a few different types, each suited to specific garden needs:
Water pressure is critical for a drip irrigation system. Too high, and you risk damaging the components. Too low, and the water won’t reach all plants effectively.
Soil type affects how water is absorbed and distributed:
Understanding these components and considerations will help you set up an effective drip irrigation system for your vegetable garden.
Next, we’ll cover how to choose the right materials for your specific garden needs.
Before diving into the installation, it’s crucial to plan your drip irrigation system effectively. This involves understanding your garden layout, plant needs, water source, and system capacity.
Start by sketching a simple layout of your garden. Include the positions of your vegetable beds, pathways, and any existing water sources like a hose bib or spigot. This visual guide helps you determine where to place the main supply lines and drip lines.
Different plants have different water requirements. Group plants with similar needs together to ensure efficient watering.
Your water source determines the efficiency and effectiveness of your drip system.
Consider the size of your garden and the number of plants to determine the system’s capacity. This helps you decide on the number of emitters, length of drip tape, and other materials needed.
By carefully planning your drip irrigation system, you’ll ensure that every part of your garden receives the right amount of water, saving you time and effort in the long run.
Next, we’ll discuss how to choose the right materials for your drip irrigation system.
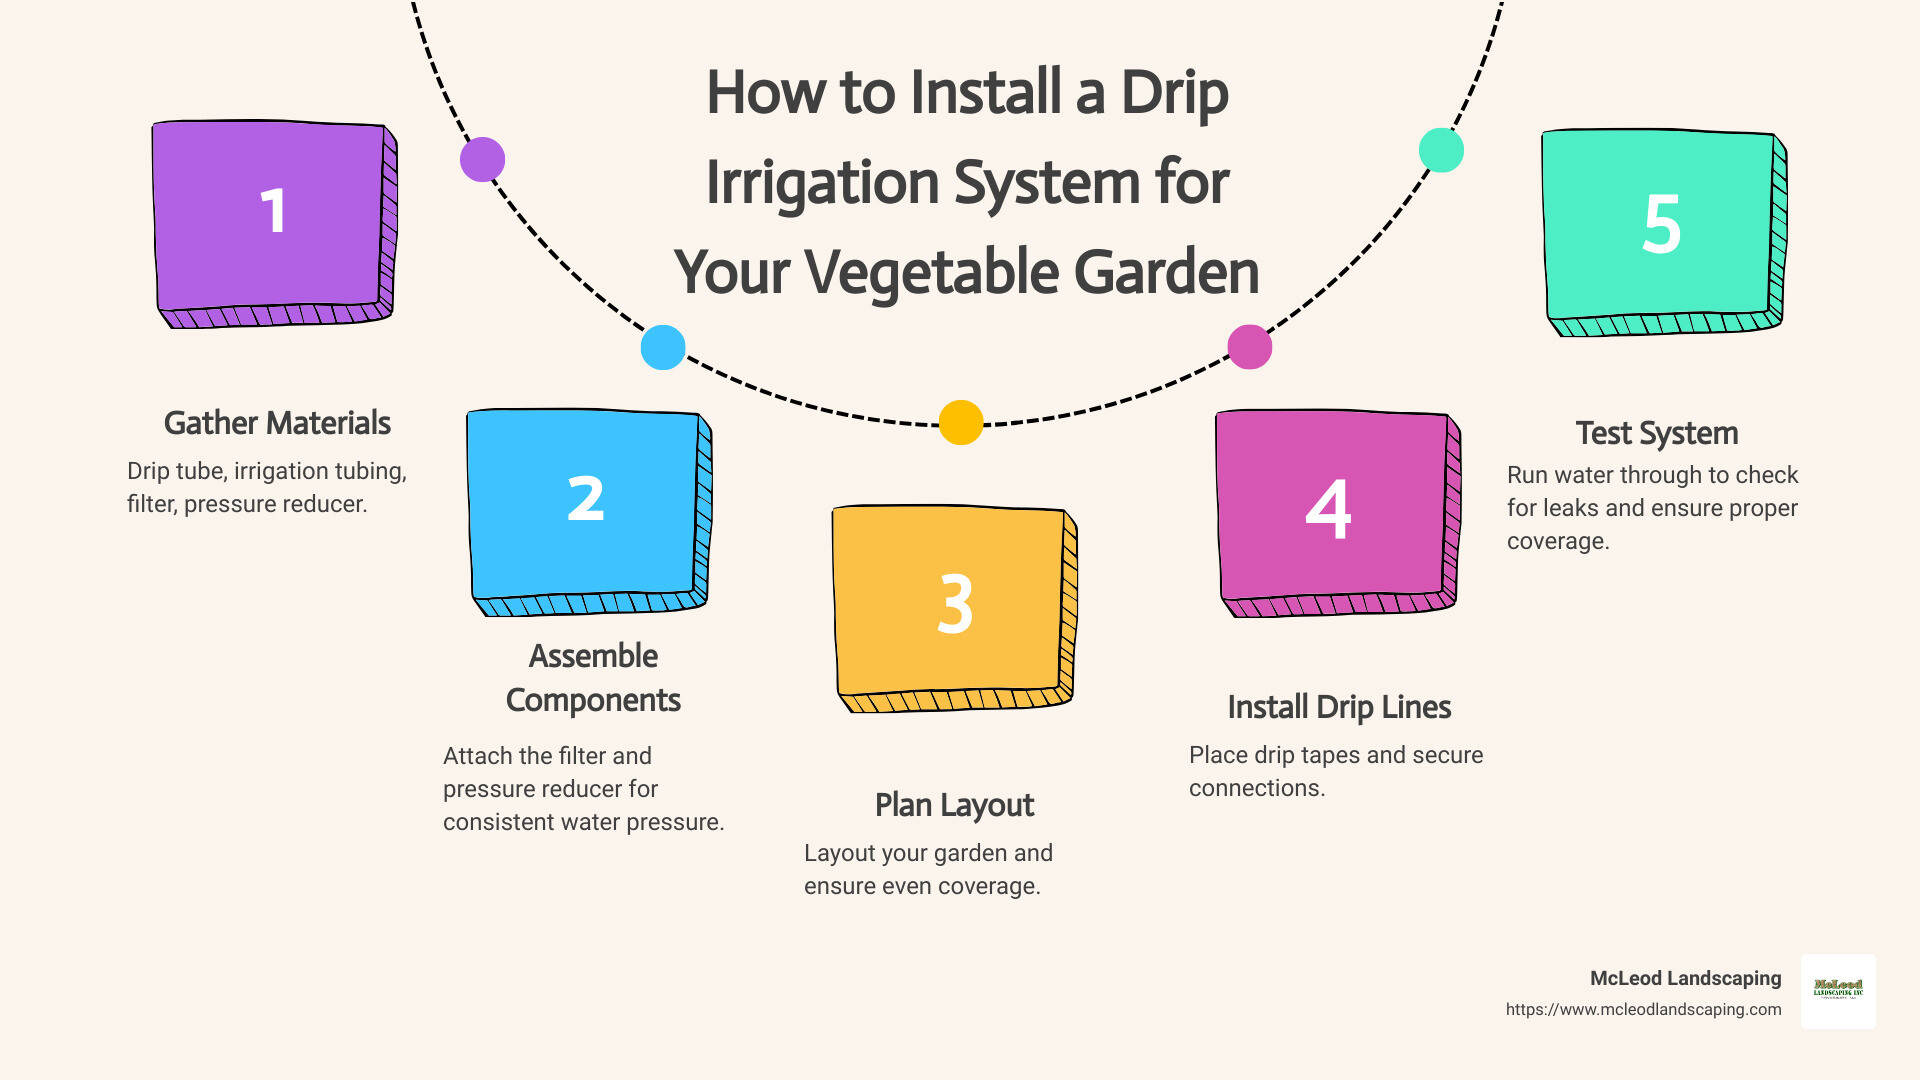
Before you start, gather all the necessary materials. Here’s what you’ll need:
By following these steps, you can install a drip irrigation system that will keep your vegetable garden well-watered and thriving with minimal effort on your part.

Next, we will cover maintenance and troubleshooting to keep your system running smoothly year-round.
Once you’ve installed your drip irrigation system, regular maintenance is key to keeping it running smoothly. Here’s how to handle cleaning filters, repairing leaks, and winter preparation.
Why Clean Filters?
Filters prevent debris from clogging your emitters. A clogged filter can reduce water flow and efficiency.
How to Clean Filters:
1. Turn Off the System: Before you start, make sure to turn off the water supply.
2. Remove the Filter: Unscrew the filter housing from the main line.
3. Rinse the Filter: Use a garden hose to rinse off any debris trapped in the filter. For stubborn dirt, you can use a soft brush.
4. Reassemble: Once clean, reassemble the filter and screw it back onto the main line.
Tip: Check and clean your filters every month during the growing season.
Identifying Leaks:
Leaks can occur due to wear and tear or improper installation. Look for wet spots in otherwise dry soil or listen for hissing sounds.
How to Repair Leaks:
1. Locate the Leak: Identify the exact location of the leak.
2. Cut Out Damaged Section: Use a pair of scissors or a pipe cutter to remove the damaged section of drip tape or tubing.
3. Insert Connectors: Use barbed connectors to rejoin the cut ends. Push the tubing fully onto the barbs to ensure a tight fit.
4. Test the System: Turn the water back on to check if the leak is fixed.
Quote: “I swore at myself for not doing it sooner. Big swears too.” – Reddit User
Why Prepare for Winter?
Freezing temperatures can cause your drip system to crack or burst. Proper winter preparation can save you from costly repairs.
How to Prepare:
1. Drain the System: Turn off the water supply and open the end caps to drain any remaining water.
2. Blow Out the Lines: Use compressed air to blow out residual water from the lines. This is especially important in areas with harsh winters.
3. Remove and Store Components: Take off removable parts like filters and timers. Store them indoors to protect them from freezing.
4. Cover Exposed Lines: Use mulch or soil to cover any exposed drip lines to provide extra insulation.
Fact: “It took 3 days after work to install (working 2-3 hours each time) and I love it with all of my heart.” – Reddit User
Regular maintenance and quick troubleshooting can extend the life of your drip irrigation system and ensure your garden remains lush and productive.
Next, we will address some frequently asked questions about drip irrigation to help you get the most out of your system.
The frequency of watering your vegetable garden with drip irrigation depends on several factors, including soil type, plant needs, and weather conditions.
A good starting point is to water your vegetable garden for 1 hour every 2-3 days. Adjust as needed based on how your plants respond.
Emitter spacing in a vegetable garden depends on the type of plants you’re growing and their water needs.
This spacing ensures even water distribution and helps prevent dry spots in your garden.
Yes, you can install a garden irrigation system yourself! Many gardeners find the process straightforward once they get started.
However, if you feel overwhelmed, don’t hesitate to seek professional help. A professional can ensure the system is installed correctly and efficiently.
Next, we will conclude our guide by summarizing the benefits of drip irrigation and how McLeod Landscaping can help you achieve a sustainable and productive garden.
Drip irrigation is an efficient and sustainable solution for watering your vegetable garden. It conserves water, ensures deep soil penetration, and allows you to work in your garden without interruptions. But beyond the technical benefits, it also offers a sense of empowerment and achievement for DIY enthusiasts.
At McLeod Landscaping, we believe in empowering gardeners to take control of their irrigation needs. Whether you’re a seasoned gardener or a beginner, installing a drip irrigation system can be a fulfilling project. It helps you understand your garden’s water requirements and ensures your plants receive the right amount of moisture.
However, if the process feels daunting or you prefer to have a professional touch, we’re here to help. Our team of experts can guide you through every step of the installation process or handle the entire setup for you. We ensure that your system is not only efficient but also custom to your garden’s unique needs.
By choosing McLeod Landscaping, you’re not just investing in an irrigation system; you’re committing to a sustainable gardening practice. Our systems are designed to minimize water waste and promote healthy plant growth, helping you create a vibrant and productive garden.
For more information on our irrigation system services, visit our Irrigation System Services page. Let’s work together to make your gardening experience more enjoyable and sustainable.
Drip irrigation is a game-changer for any vegetable garden. With the right materials and guidance, you can transform your garden into a thriving, water-efficient oasis. And remember, whether you choose to DIY or seek professional help, McLeod Landscaping is here to support you every step of the way.
Contact McLeod Landscaping today at (978) 640-0957 or click here to schedule a consultation for retaining wall installation. Let our experienced team design and install a functional and visually appealing retaining wall that enhances your landscape.

1881 Main St Unit 1, Tewksbury, MA 01876