Install irrigation systems save time, conserve water, and keep your landscape healthy year-round. Here’s what you need to know:
Key Installation Steps:
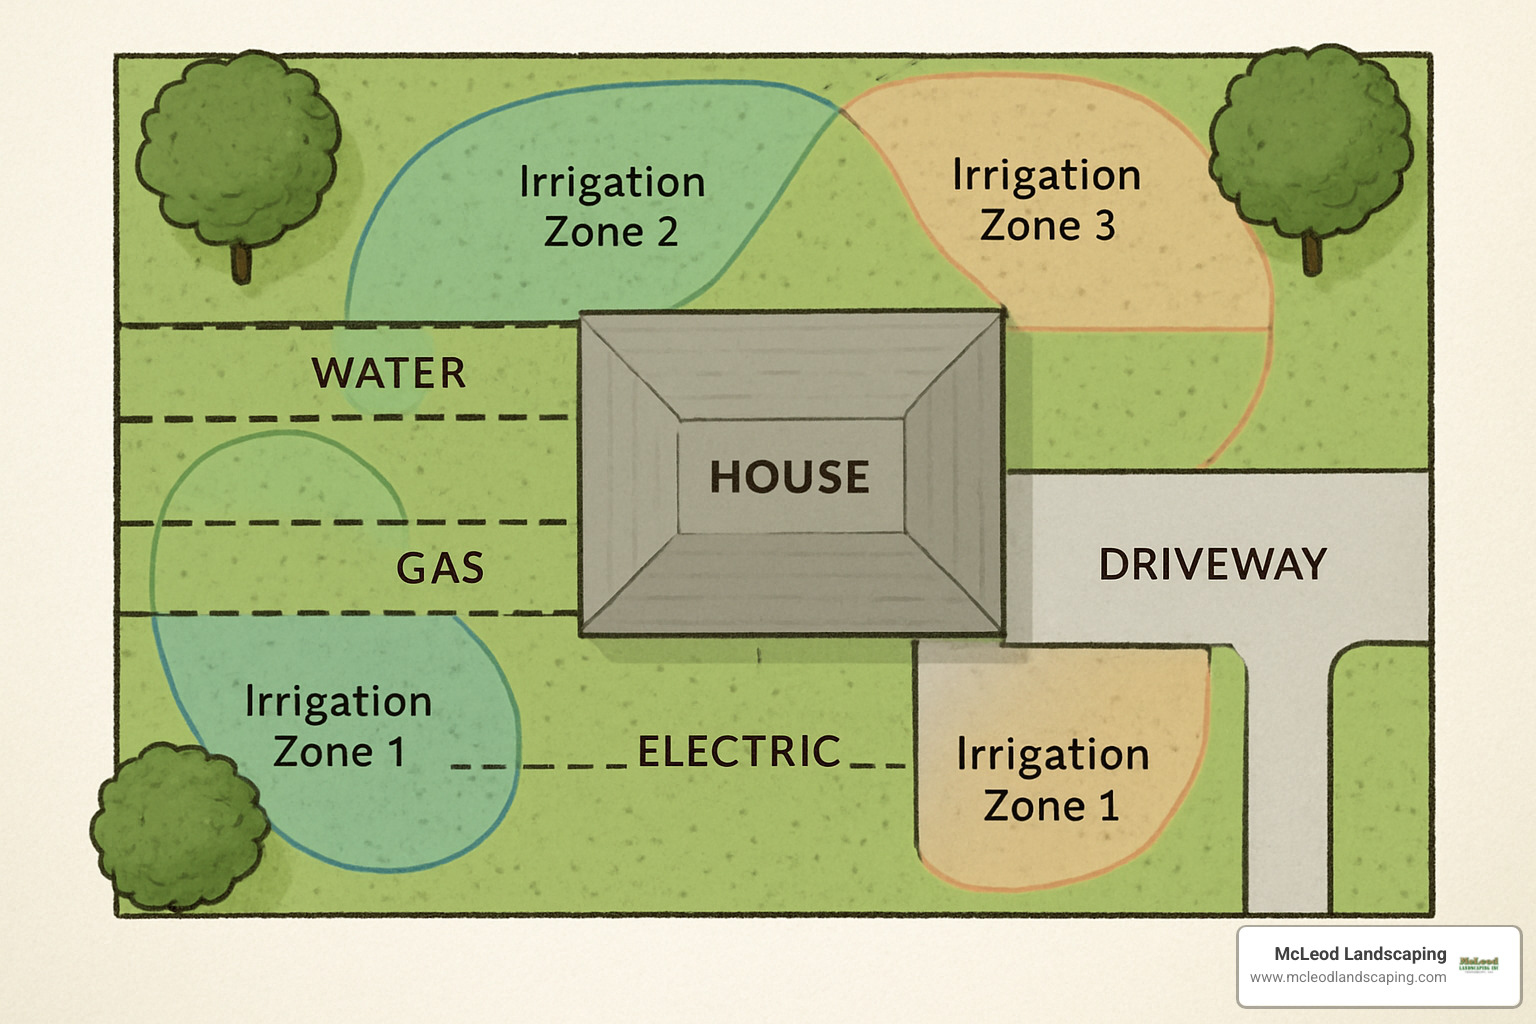
1. Plan & Design – Map zones, check water pressure, call 811 for utility marking
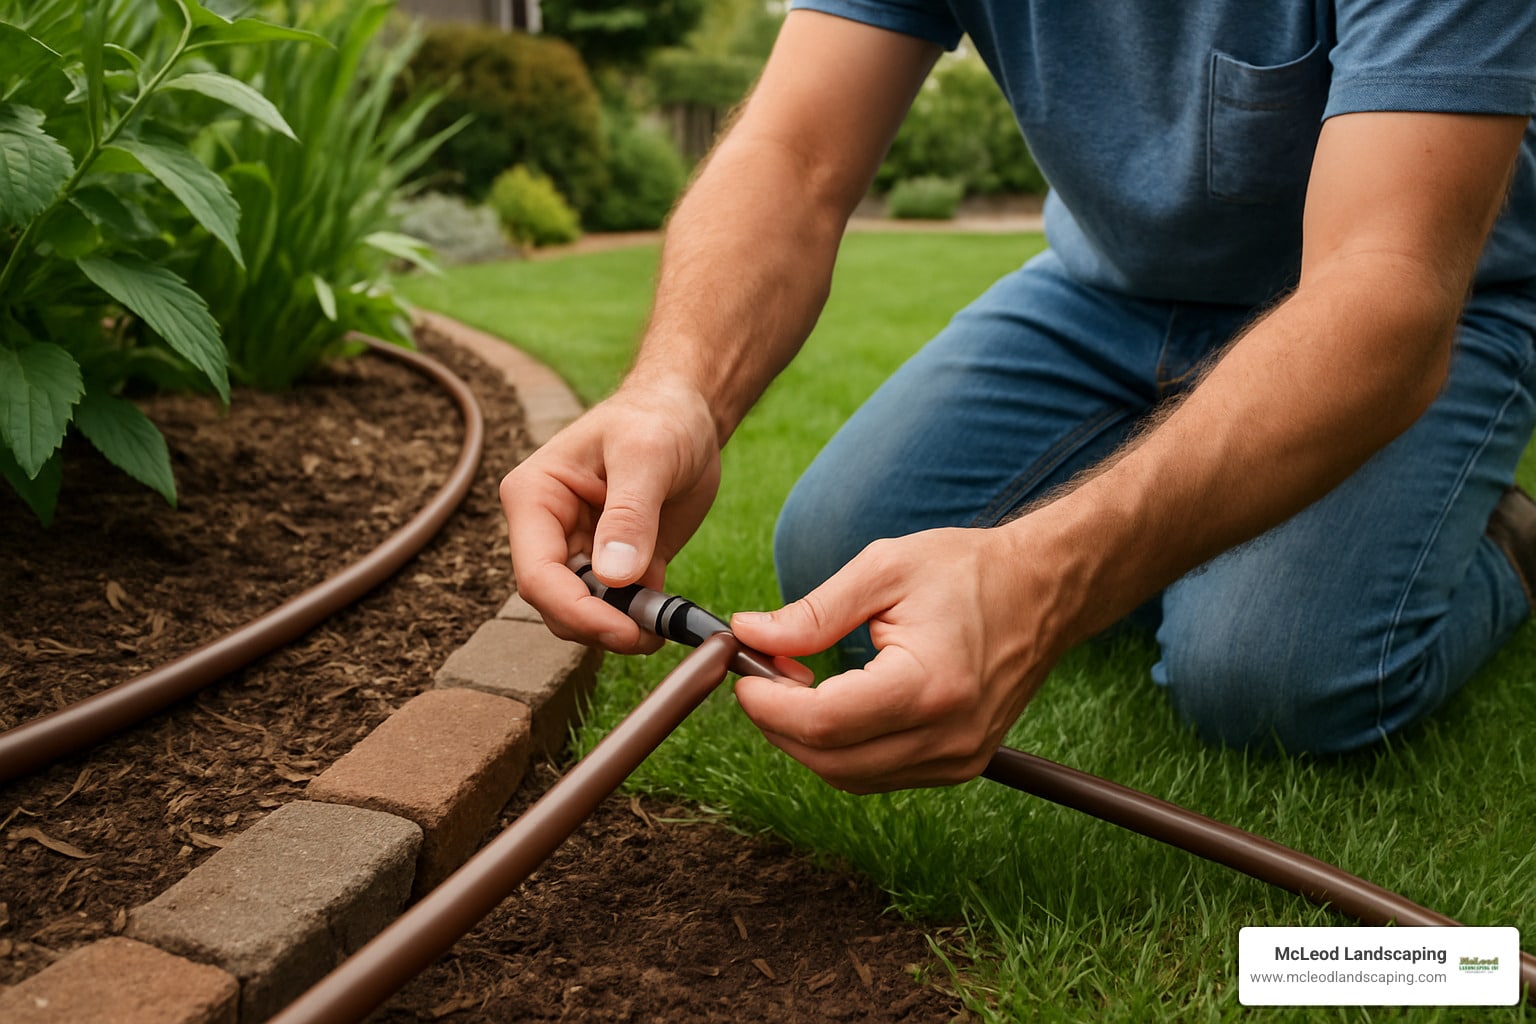
2. Choose System Type – Drip for gardens, sprinklers for lawns, soaker hoses for beds
3. Install Components – Dig trenches 6-12″ deep, lay pipes, connect valves
4. Add Controls – Mount timer, wire zones, program schedules
5. Test & Adjust – Check coverage, fix leaks, fine-tune spray patterns
DIY installations typically cost between $500-$1,500, while professional systems average around $3,600 according to industry data. The benefits include water savings up to 30% with smart controllers and significantly increased property value.
I’m Scott McLeod, owner of McLeod Landscaping, and I’ve helped clients install irrigation systems across the Merrimack Valley for over 30 years. My team and I have seen every challenge from rocky New England soil to tricky slope drainage, so I’ll share the real-world tips that make DIY installation successful.
Install irrigation glossary:
– drip irrigation systems
– lawn irrigation system repair
– average cost for lawn irrigation system
The first step to successfully install irrigation is picking the right system for your specific needs. Your choice boils down to yard size, what you’re growing, soil type, and local climate. Most properties work best with a combination approach. For a deeper dive into the history and science behind irrigation, check the Irrigation article on Wikipedia.
Drip irrigation works beautifully for garden beds, trees, and shrubs – super-efficient and uses 20-50% less water than traditional sprinklers. In-ground sprinklers are your go-to for large lawn areas where you need even coverage. Soaker hoses hit that sweet spot for flower beds and vegetable gardens.
Here in Massachusetts, we can’t ignore our freezing winters when choosing systems. Your soil type matters too – sandy soils drain fast and need more frequent watering, while clay soils hold water longer but can create runoff issues.
Don’t forget about zoning and water efficiency. Modern systems let you create different watering schedules for different areas. Your water source capacity will determine how elaborate you can get.
Drip irrigation wins the precision game every time. It delivers water directly to plant roots with almost zero waste from evaporation. We’ve measured up to 90% water efficiency with properly designed drip systems. The low evaporation rate means you’re not losing water to wind or hot sun.
Sprinklers excel at covering large areas quickly. A single rotary head can water a 30-foot radius, making them perfect for expansive lawns. They also provide cooling effects on hot summer days. The downside? They’re more susceptible to wind drift and evaporation.
Drip systems operate at much lower pressure – typically 10-30 PSI compared to 40-65 PSI for sprinklers. This can be a game-changer if you have low water pressure issues.
Plants have completely different water requirements, and grouping them correctly (hydrozoning) is crucial for system efficiency. Think of your landscape in water zones rather than just plant arrangements.
High-water plants like new plantings and vegetables need frequent, generous watering. Medium-water plants including established perennials can handle moderate, less frequent watering. Low-water plants such as native species prefer to dry out between waterings.
Shaded areas typically need 30-50% less water than full-sun locations. Slopes require shorter, more frequent watering cycles to prevent runoff. Landscape beds and turf areas should almost always be on separate zones.
More info about Types of Lawn Irrigation Systems
Skip this step, and you’ll regret it. Start by walking your property with a measuring tape and clipboard. Note every tree, sidewalk, garden bed, and obstacle. Transfer measurements to graph paper using a scale of 1 inch equals 10 feet.
Water source location drives everything else. Most residential systems connect to the main water line between your meter and house. You’ll need space for a backflow preventer (required by code) and a dedicated shutoff valve.
Research local permit requirements – some Massachusetts towns require permits for irrigation work. Call 811 before digging to mark underground utilities. This free service prevents dangerous gas line strikes. In Massachusetts, you must call at least 72 hours before breaking ground.
Don’t forget frost line depth – 42 inches deep for main lines in our area. PVC works great for main lines but becomes brittle in freezing temperatures. Polyethylene pipe costs more but handles New England winters better.
PVC vs Polyethylene Pipe Comparison:
| Feature | PVC | Polyethylene |
|---|---|---|
| Durability | Excellent | Good |
| Freeze Resistance | Poor | Excellent |
| Installation | Rigid, needs fittings | Flexible, fewer fittings |
| Cost | Lower | Higher |
| Best Use | Main lines, warm climates | Lateral lines, cold climates |
Testing static pressure – attach a pressure gauge to your outdoor spigot, turn it on full blast, and read the number. You want 40-80 PSI for most residential systems.
Flow rate testing requires a stopwatch and 5-gallon bucket. Time how long it takes to fill the bucket. Divide 300 seconds by your fill time and multiply by 5 to get gallons per minute (GPM). Most homes have 15-25 GPM available.
Each sprinkler head uses 2-6 GPM depending on size and pressure. With 20 GPM available, you can typically run 4-8 heads per zone.
Each zone should group plants with similar water needs and sun exposure. Head-to-head coverage is your goal – position each head so its spray pattern just touches the next head’s pattern.
Slopes need special consideration. Install heads at the top of slopes and program shorter run times with multiple cycles. Shaded areas need 30-50% less water than full-sun locations.
Time to actually install irrigation components. Take your time with each step – rushing leads to leaks and poor coverage.
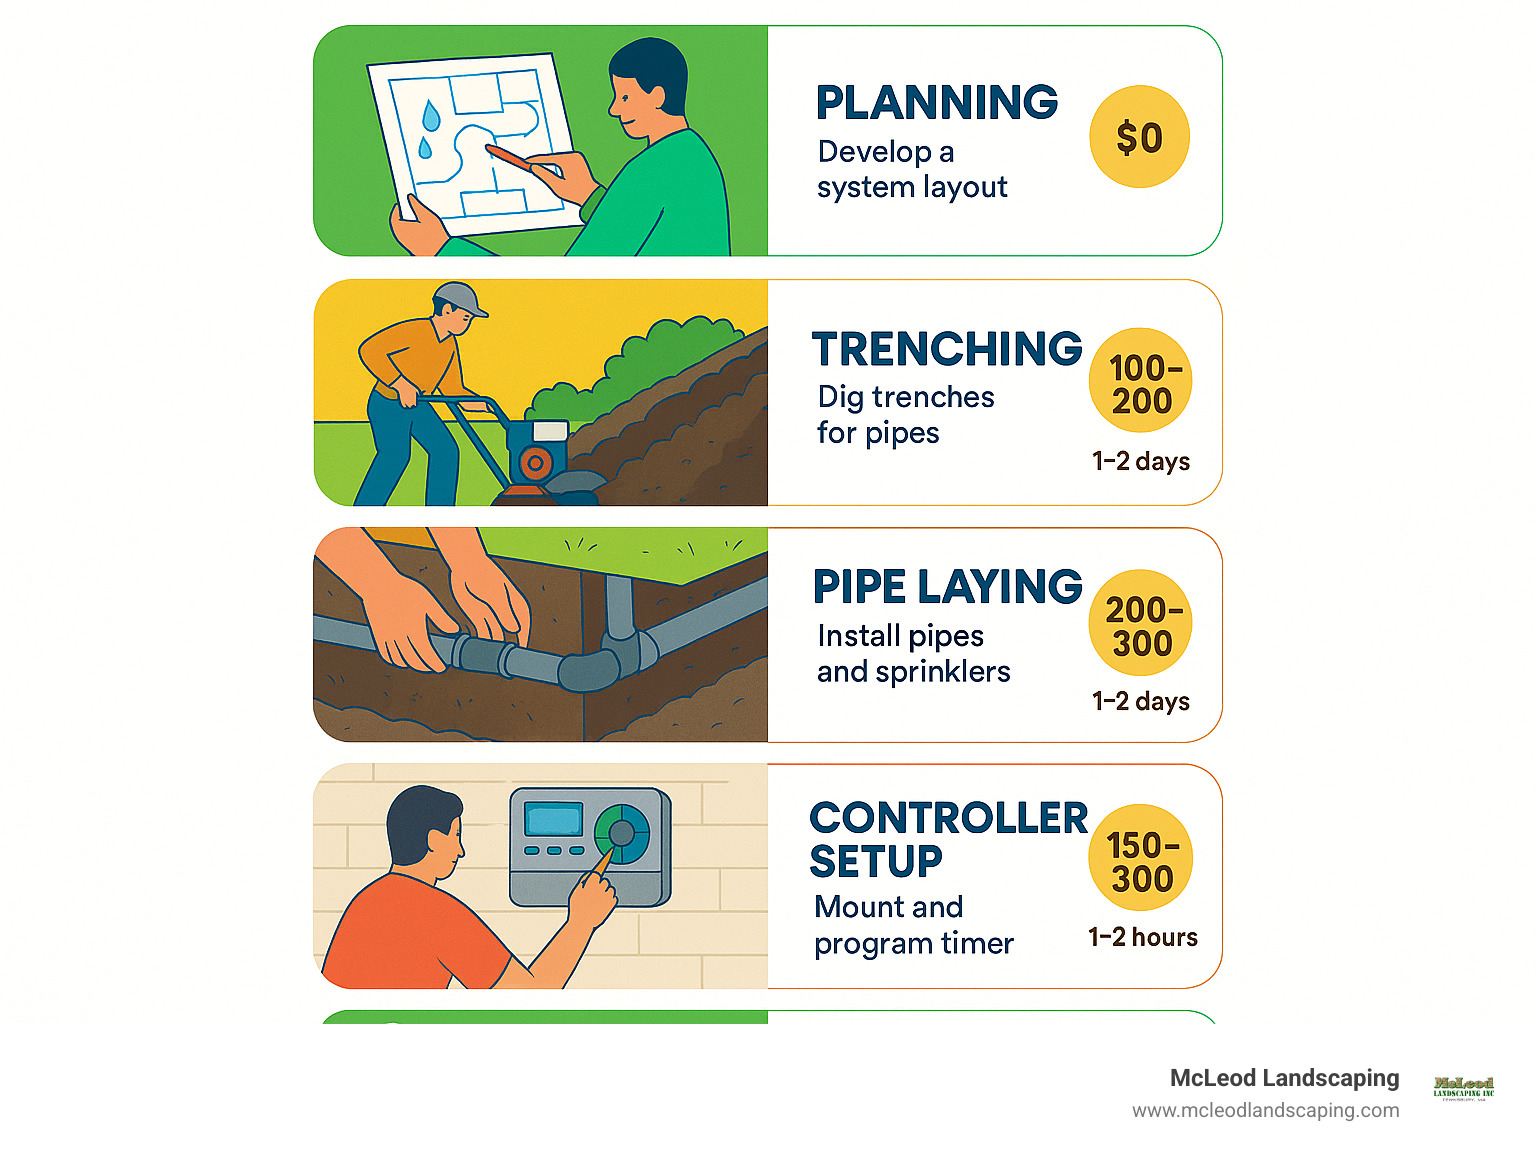
Installation Sequence:
1. Install main line and backflow preventer
2. Dig trenches and lay pipe
3. Install valve manifold
4. Connect lateral lines to valves
5. Install sprinkler heads or emitters
6. Wire and program controller
7. Test system and adjust coverage
Always wear safety gear including eye protection. Start with the main line connection – in Massachusetts, this typically requires a licensed plumber. The backflow preventer must be installed according to local code, usually 12 inches above ground level.
Your manifold assembly is the control center where water gets distributed to different zones. Choose a location that’s accessible but protected from foot traffic. Valves control water flow to each zone and need electrical connection to your controller.
Use swing pipe connections between valves and main lines to prevent damage from soil settling. Invest in stainless steel clamps that’ll last. For drip systems, install a 200-mesh filter at the zone valve to prevent clogging.
More info about How to Install an Irrigation System
Trench depth is non-negotiable. Go 6-12 inches deep minimum, with deeper trenches for main lines. In Massachusetts, anything carrying water year-round needs to be below the frost line – 42 inches deep.
A vibratory plow is worth considering for larger installations. These machines pull pipe through the ground at correct depth without creating open trenches.
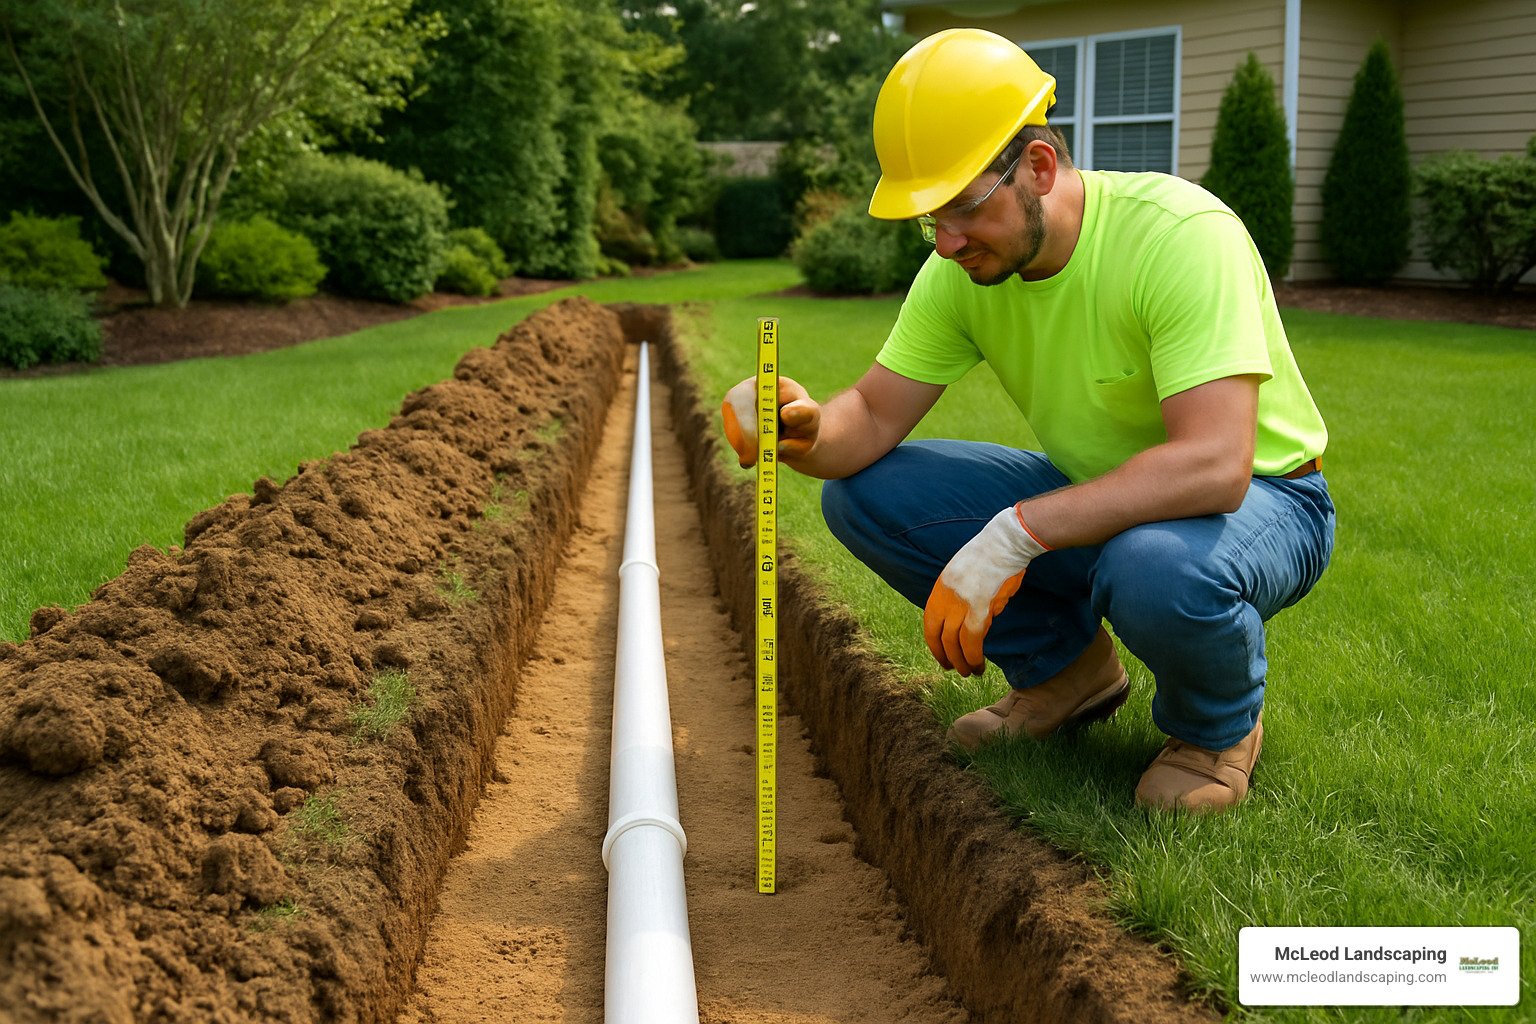
Avoid kinks at all costs – cut out any kinked sections and start over. Use double clamps on all main line connections. Remove sharp rocks from trench bottoms and use sand bedding in rocky soil.
Cap all pipe ends immediately after cutting to prevent debris entry. Cover openings with duct tape until final connections.
Your controller is the system’s brain. Choose a mounting spot 4-5 feet above ground, preferably in a garage or covered area. Outdoor installations need weatherproof enclosures.
Run low-voltage wire from controller to each valve, using 14-gauge wire for runs under 200 feet. Connect the common wire to all valves first, then run individual zone wires.
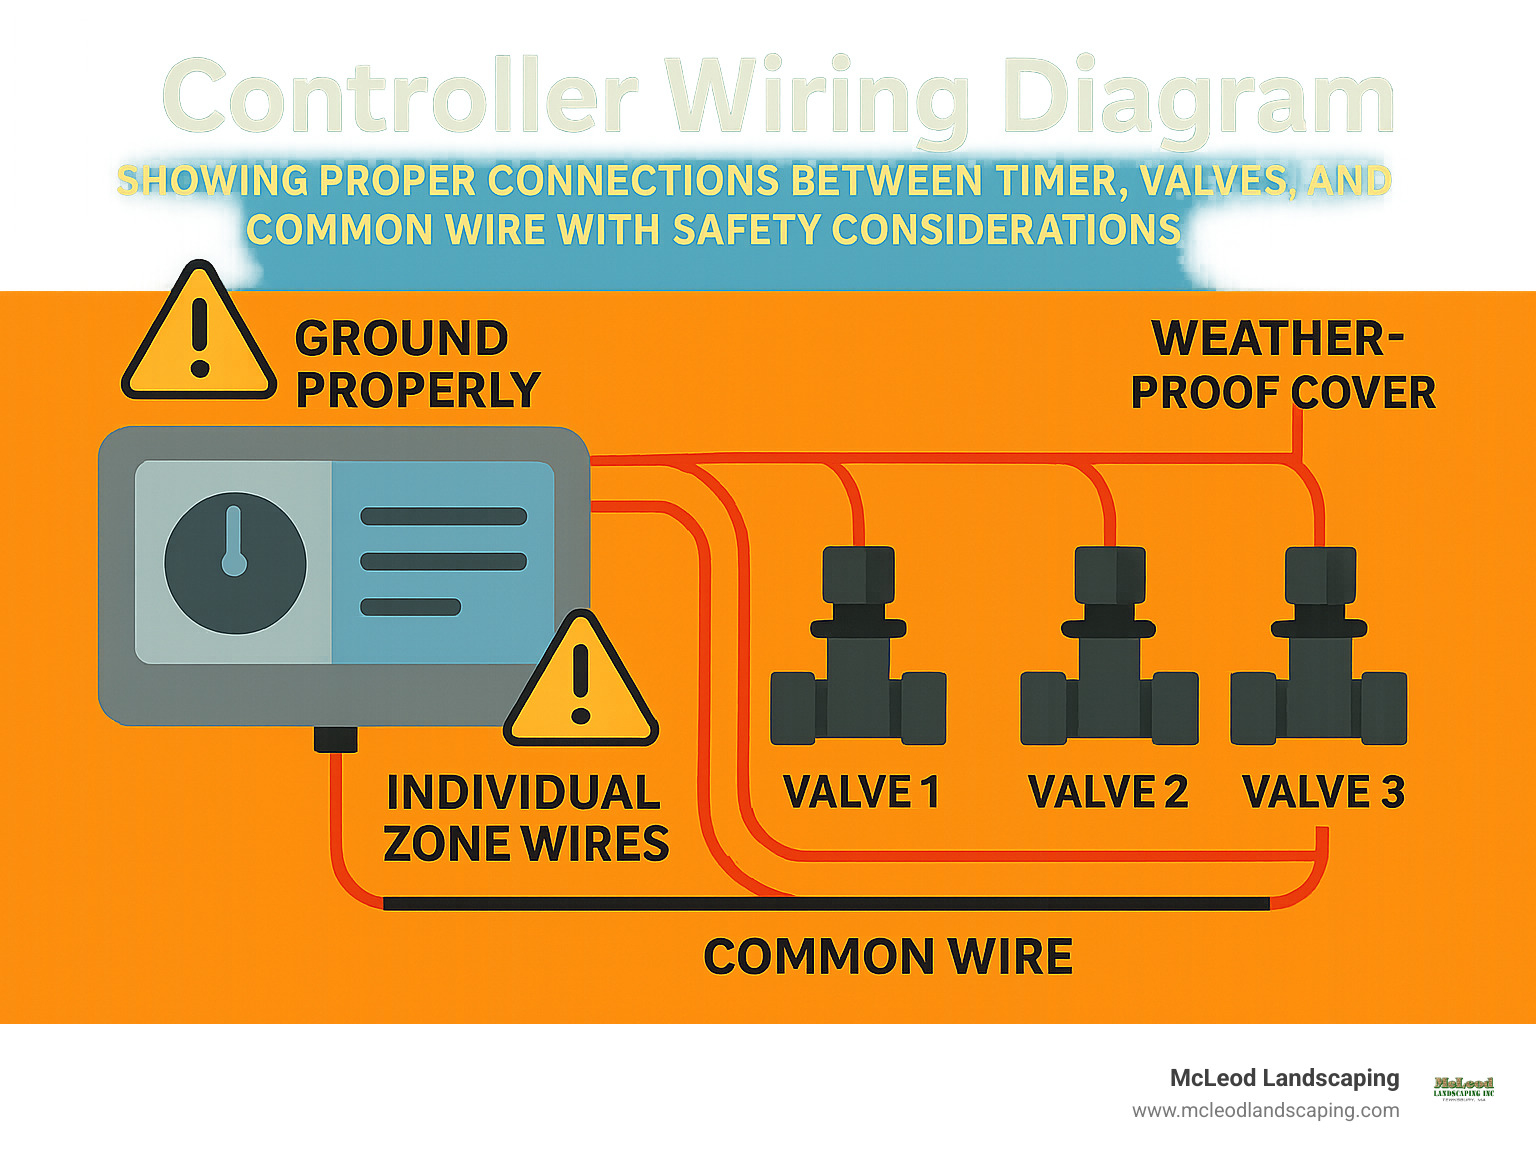
Smart controllers automatically adjust watering schedules based on local conditions, potentially saving 20-30% on water usage. Rain sensors are required by code in many Massachusetts municipalities.
Start with conservative run times during initial programming – most zones need 15-20 minutes for sprinklers, 30-60 minutes for drip irrigation.
DIY installations typically cost between $500-$1,500 for most residential properties according to internet research data (not McLeod Landscaping pricing). Professional installations average around $3,600, though high-end systems can reach $15,000 or more.
Materials and labor split roughly 50/50 on professional jobs. When you install irrigation yourself, you’re trading time and effort for that labor portion. Per-zone costs for professional installation typically run $700-$1,200 according to industry data.
Most Massachusetts municipalities require permits for irrigation installations. Permit fees typically range from $50-$200. The process usually involves backflow preventer installation (often requiring a licensed plumber) and final inspection.
More info about How Much Does It Cost to Install an Irrigation System?
End-of-season sales are golden – September through October, suppliers discount irrigation equipment heavily. Plan installation for early spring but buy materials the previous fall.
Complete kits often cost less than buying individual components separately. Renting a trencher for a day costs $100-$200 but can save hundreds in excavation charges.
Consider phasing your installation – start with critical zones and expand later.
Skipping the system flush is the biggest rookie mistake. You must flush each zone for 2-3 minutes before installing sprinkler heads. Construction debris will clog nozzles.
Burying pipes too shallow guarantees freeze damage. Follow frost line requirements. Ignoring backflow preventer requirements isn’t just a code violation – it’s a contamination risk.
Mismatched sprinkler heads in the same zone create coverage nightmares. Different head types have different flow rates and spray patterns.
Thorough testing makes the difference between a system that works and one that works beautifully. Start with a basic pressure test on each zone, looking for leaks or heads that aren’t popping up properly.
The cup test reveals whether coverage is uniform. Place identical containers throughout each zone’s coverage area. Run the system for 15 minutes, then measure water collected. If variation exceeds 25%, adjust head positions.

Smart technology upgrades deliver real water savings. Weather-based controllers automatically adjust watering schedules, potentially reducing water usage by 20-30%. Rain sensors prevent watering during storms. Flow meters detect leaks immediately.
Many utilities offer substantial rebates for water-efficient irrigation equipment – often covering 25-50% of upgrade costs.
Fine-tuning takes patience but transforms good installations into great ones. Focus on basic coverage verification during the first week. Week two and three are for adjusting run times based on actual soil moisture levels.
Soil moisture checks prevent overwatering. Push a long screwdriver 6 inches into soil about 24 hours after watering. It should penetrate easily in properly watered areas.
More info about Drip Irrigation System upkeep
Weather-based controllers use local weather data to adjust watering automatically. Look for products with EPA WaterSense certification – these meet strict efficiency criteria and often qualify for utility rebates.
Soil sensors measure actual moisture levels at root depth, eliminating guesswork. The return on investment for smart irrigation technology is typically 2-3 years through water savings alone.
Here in Massachusetts, bury pipes at least 8-10 inches deep for standard installations, with deeper burial in high-traffic areas. Our frost line sits at 42 inches deep – any pipes carrying water year-round must go below this depth.
For seasonal systems that get properly winterized, 8-10 inch depth provides good protection while keeping repairs manageable.
Simple, single-zone systems are definitely DIY-friendly, especially drip irrigation for garden beds. However, complex multi-zone systems often benefit from professional expertise.
Consider professional installation when your system needs more than 4-6 zones, requires main water supply connection, or involves challenging site conditions. Local codes often require licensed plumber involvement for main line connections.
DIY makes sense for smaller projects, seasonal systems, or when you have time to learn. The middle ground works well too – hire professionals for complex parts like main line connections, then handle simpler components yourself.
In Massachusetts, plan to winterize by mid-to-late October. Start by shutting off water supply at your main shutoff valve. Next, drain all water from pipes and components – standing water expands when frozen and cracks everything.
Compressed air blowout provides thorough water removal but requires proper equipment. Use 40-80 PSI maximum pressure. Insulate above-ground components like backflow preventers and valve boxes.
Many homeowners hire professionals for winterization service rather than investing in equipment they’ll only use once yearly.
Installing irrigation systems might seem overwhelming, but thousands of homeowners successfully tackle these projects every year. The secret is taking time to plan properly and following proven steps.
You’ll save hours weekly dragging hoses, reduce water waste by up to 30% with smart controllers, and enjoy consistently green landscapes. A well-designed system typically pays for itself within 3-5 years through water savings and increased property value.
Start small – maybe just the front lawn or main flower beds. Once you see how well that first zone performs, expanding becomes much easier. The planning phase makes or breaks most installations, so spend extra time mapping zones and testing water pressure.
At McLeod Landscaping, we’ve watched irrigation technology evolve dramatically over our 30+ years serving the Merrimack Valley. Today’s systems are more reliable, efficient, and user-friendly than ever before.

Sometimes DIY projects hit unexpected snags – rocky soil, utility conflicts, or complex zoning requirements. That’s where professional consultation makes sense. We’re always happy to review DIY plans, troubleshoot installation problems, or handle specific tasks like main line connections that require licensed expertise.
Your landscape change starts with that first sprinkler head or drip emitter. Take it one zone at a time, celebrate small victories, and don’t hesitate to ask for help when you need it. More info about our irrigation solutions – we’re here to support your success every step of the way.
Contact McLeod Landscaping today at (978) 640-0957 or click here to schedule a consultation for retaining wall installation. Let our experienced team design and install a functional and visually appealing retaining wall that enhances your landscape.
1881 Main St Unit 1, Tewksbury, MA 01876