
Deck patio construction is the process of planning, permitting, and building an elevated or ground-level outdoor living surface — and it’s one of the highest-ROI home improvement projects you can take on.
Here’s a quick overview of what the process involves:
Based on general internet data, a professionally built 12×16 ft deck typically averages around $14,000, with total installation costs ranging widely from $5,000 to over $45,000 depending on materials and site conditions. Please note that these figures are average costs based on internet data and do not reflect the actual project pricing of McLeod Landscaping. Go the DIY route and your material costs drop to roughly $2,500–$6,000 — a potential saving of thousands of dollars.
That gap is exactly why so many homeowners are picking up a tape measure and doing it themselves.
But here’s the thing: a deck is a load-bearing structure. Done right, it adds curb appeal, resale value, and years of outdoor enjoyment. Done wrong — especially at the ledger board or footings — it can fail catastrophically. Ledger board failure is, in fact, the leading cause of deck collapses in the United States, according to the North American Deck and Railing Association (NADRA).
This guide walks you through the entire process — from choosing between a deck and a patio, to materials, permits, structural safety, and advanced features like roof covers and multi-level integration.
I’m Scott McLeod, owner of McLeod Landscaping in Tewksbury, MA, and I’ve spent over 30 years building and overseeing deck patio construction projects across the Merrimack Valley. Whether you’re tackling this yourself or deciding when to call in a pro, the steps ahead will give you the foundation you need to get it right.

Easy deck patio construction glossary:
Before you buy a single piece of lumber or dig your first hole, you must answer the fundamental question: Should you build a deck or a patio? While they both serve as the stage for your outdoor memories, their structural requirements, cost profiles, and terrain suitabilities are completely different.

If your backyard in Andover, Billerica, or Chelmsford has a steep slope, a deck is almost always your best choice. Decks are elevated structures supported by posts, meaning they can easily span uneven or highly sloped ground to create a level living space.
Patios, on the other hand, sit directly on the ground. Building a patio on a slope requires significant excavation, soil grading, and the construction of retaining walls to keep the foundation level. If your yard is flat, a patio is a highly durable, low-maintenance option that blends seamlessly with your lawn.
Both options boost your home’s resale value, but they appeal to different buyer preferences. Decks offer that classic elevated look and transition beautifully from second-story kitchen doors. Patios provide a grounded, organic feel and are highly favored for their incredible lifespan.
To help you decide, we have put together a comprehensive comparison:
| Feature | Wood/Composite Deck | Stone/Paver Patio |
|---|---|---|
| Typical Elevation | Elevated or Ground-Level | Ground-Level Flush |
| Terrain Best Suited For | Sloped, uneven, or rocky ground | Flat, stable, well-draining soil |
| Average Lifespan | 20–30 years (wood); 25–50 years (composite) | 50+ years (high-quality stone/pavers) |
| Maintenance Needs | Staining/sealing (wood) or annual wash (composite) | Sweeping, weeding, and occasional joint sand |
| Drainage Style | Natural drainage through board gaps | Surface runoff sloped away from the house |
| Relative Cost | Moderate to High | Low to Moderate (30–50% less than decks) |
For a deeper dive into choosing the right layout and style, check out our guide on Backyard Patio Deck Designs or read How to Build Decks and Patios: A Complete Guide for Beginners – Baxter House for a detailed look at beginner-friendly layouts.
You cannot build a great outdoor space without a solid plan. In deck patio construction, the preparation phase is where the longevity of your build is decided.

Let’s clear up a common myth: yes, you almost certainly need a building permit. In most Massachusetts jurisdictions, including Lowell, Concord, and Westford, a permit is required for any deck attached to a house, any freestanding deck over 200 square feet, or any structure elevated more than 30 inches above the ground. A building permit typically costs between $50 and $200, and skipping it can lead to massive fines, insurance claim denials, or major headaches when you try to sell your home.
Before you touch a shovel, you must take these three steps:

Your choice of materials directly impacts your budget, your deck’s lifespan, and how many weekends you’ll spend maintaining it. Here is how the most common choices stack up:
This is the most popular and economical option. Pressure-treated (PT) wood costs roughly $1.50 to $3.00 per linear foot. It is treated with chemical preservatives to resist rot and insects, but it requires annual cleaning and sealing every 1 to 2 years to prevent warping and splitting.
Brands like Trex or TimberTech are made from a blend of wood fibers and recycled plastics. Composite boards cost about $3.00 to $8.00 per linear foot. They last 25 to 50 years, never splinter, and require nothing more than a quick annual wash. Plus, they are incredibly eco-friendly; a standard 500-square-foot composite deck saves roughly 140,000 plastic bags from ending up in landfills.
Made entirely of cellular PVC, these premium boards are completely impervious to moisture, making them perfect for pool surrounds. They are highly scratch-resistant but sit at the top of the price scale.
Woods like Ipe, Cedar, and Redwood offer breathtaking natural beauty and built-in resistance to decay. However, they are highly labor-intensive to install. Ipe is so dense that it actually weighs double the weight of pressure-treated pine (about 70 lbs per cubic foot) and requires specialized carbide tools and pre-drilling.
For a complete checklist of everything you will need to order, refer to the Deck Building Materials List — Full Checklist | HardHatCalc . If you are leaning toward a hardscape foundation instead, read our breakdown of The Complete Guide to Patio Building Cost to plan your budget accurately.
If you have an old, stained, or cracked concrete patio in Burlington or Wilmington, you don’t have to pay thousands of dollars for demolition. Building a low-profile deck directly over the slab is a smart, cost-effective upgrade.
To avoid trapping moisture and rotting your new structure, you must follow a specialized process:
The existing concrete must be structurally sound and sloped away from your home’s foundation (at least a 1/8-inch drop per foot) so water doesn’t pool beneath your deck. If the concrete is sinking or sloping toward your house, you must resolve the drainage issues first.
Do not lay framing lumber flat on concrete. Concrete acts as a thermal mass that absorbs and slowly releases moisture, which will rapidly rot raw wood. Instead, use a “sleeper system.” Sleepers are pressure-treated 2×4 or 2×6 boards laid flat or on edge, elevated slightly off the concrete using thick rubber shims or adjustable plastic pedestals. This creates a crucial 1/2-inch to 1-inch gap for airflow and water drainage beneath the wood.
Anchor your sleepers to the concrete using masonry fasteners (like Tapcon screws) or heavy-duty L-brackets. Ensure the sleepers run parallel to the direction of the water runoff so they don’t act as dams. Space your joists at 16 inches on center (or 12 inches if you are installing composite decking diagonally).
Fasten your deck boards to the sleeper joists. If you are using wood, butt wet boards tightly together because they will shrink and create gaps as they dry. If using composite, follow the manufacturer’s exact gapping instructions to allow for thermal expansion. Always use corrosion-resistant fasteners, such as hot-dipped galvanized or stainless steel screws, to prevent the chemicals in pressure-treated wood from eating away at the metal.
For a highly detailed walkthrough of this specific project, check out How to Build a Deck Over a Concrete Patio: Practical Improvement! [2026] .
Decks look simple, but they are complex load-bearing structures. According to NADRA, structural failures are far too common, and almost all of them can be prevented by focusing on two key areas: the ledger board and the framing connections.
For a general step-by-step framework of standard structural framing, you can consult How to Build a Deck — Step-by-Step DIY Guide (2026) .
The ledger board is the structural lumber that fastens your deck directly to the rim joist of your house. Ledger board failure is the leading cause of deck collapses in the United States. When a ledger pulls away from a house, the entire deck can drop instantly.
To make your ledger connection bulletproof, follow these steps:
Building codes exist to keep your family safe. Here are the absolute minimum requirements you must follow during your deck patio construction:
Any deck surface elevated 30 inches or more above the ground requires a structural guard rail.
Stair codes are highly precise. Stringers must have a maximum riser height of 7-3/4 inches and a minimum tread depth of 10 inches. The stairway must be at least 36 inches wide to allow safe passage.
In the Merrimack Valley — including Carlisle, Concord, and Tewksbury — our freezing winters cause the soil to expand and contract. This is known as frost heave. To prevent your deck from shifting, tilting, or pulling away from your house, your concrete footings must extend below the local frost line. In our region of Massachusetts, this means digging your footing holes to a depth of 36 to 48 inches.
Once the basic structure is secure, you can start customizing. Adding shelter, lighting, and distinct functional zones turns a simple deck into a true outdoor sanctuary.
If you want to use your deck during a classic New England rain shower, a custom cover is a fantastic addition.
When building a solid roof cover, you must maintain a minimum slope of a 2:12 pitch (about a 9.5-degree angle) to ensure rainwater drains properly. For lightweight, modern covers, multi-wall polycarbonate panels are an exceptional choice. They block intense sun glare while allowing natural light to filter through.
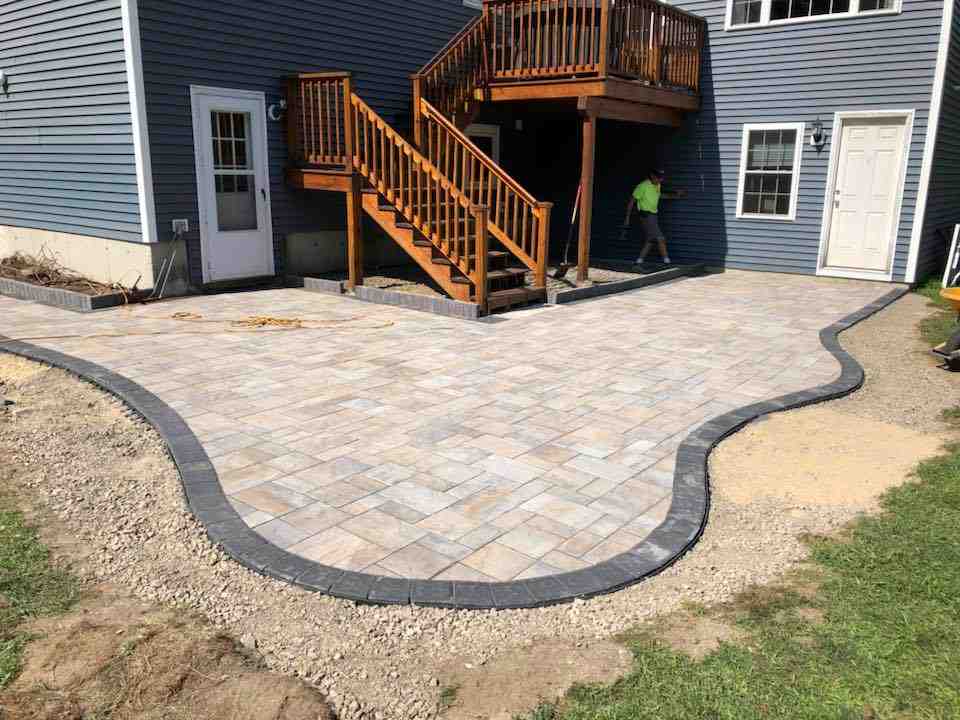
If you have a raised, two-story deck, you can install an under-deck drainage system like Trex RainEscape. This system uses flexible troughs and downspouts running between the joists to catch water draining through the deck boards, funneling it into a gutter system. This keeps the space beneath your deck completely dry, allowing you to build a second, ground-level paver patio directly underneath.
For inspiration on layouts and roof structures, take a look at 75 Stunning Back Deck Roof Ideas to Transform Your Outdoor Space or read a real-world builder’s journey in Building a Deck Patio Cover from Scratch · Vijay’s Notebook .
Why choose between a deck and a patio when you can have both? Integrating a raised deck with a ground-level hardscape patio is the ultimate way to handle a sloped backyard.
You can use a multi-level design to create separate functional zones:
To see how we design these seamless transitions, check out our Deck and Patio Services.
Based on average internet data, a professionally installed 12×16 ft deck typically costs around $14,000, with total project prices ranging widely from $5,000 to over $45,000 depending on the complexity, materials (wood vs. high-end composite), and site conditions. Building the deck yourself cuts those costs to roughly $2,500 to $6,000 in raw materials, saving you the entire cost of labor.
Please note: these figures are average costs based on general internet data and do not reflect the actual project pricing of McLeod Landscaping.
High-quality composite or PVC decking is the absolute best low-maintenance option. While wood decks require power washing, sanding, and staining every 1 to 2 years, composite decks only need a simple annual cleaning with soap and water. Top-tier composite brands like Trex come with a 25-year fade and stain manufacturer warranty and last up to 50 years without rotting, warping, or splintering.
Yes. Even if your deck sits directly over an existing concrete slab and is under 30 inches high, most local building departments in Massachusetts still classify it as a deck structure. You will need to submit a plan to secure a permit and ensure the sleeper framing does not block vital home foundation vents or weep holes.
Tackling a deck patio construction project is an incredibly rewarding way to transform your backyard into an outdoor oasis. If you have the tools, the time, and a helper for “beam day,” building it yourself can save you thousands of dollars in labor costs.
However, if your yard has a tricky slope, if you want to integrate complex hardscapes like a bluestone patio or an outdoor kitchen, or if you simply want the peace of mind that comes with a structurally engineered build, we are here to help.
At McLeod Landscaping, we bring over 30 years of local experience to every project we build across Andover, Billerica, Burlington, Carlisle, Chelmsford, Concord, Lowell, Westford, Wilmington, and our home base of Tewksbury, MA. We handle everything — from the initial design and permitting to the final walkthrough — ensuring your outdoor space is beautiful, code-compliant, and built to last a lifetime.
Ready to start planning your dream backyard? Explore our Patio Installation Services and contact us today to schedule your custom design consultation!
Contact McLeod Landscaping today at (978) 640-0957 or click here to schedule a consultation for retaining wall installation. Let our experienced team design and install a functional and visually appealing retaining wall that enhances your landscape.

1881 Main St Unit 1, Tewksbury, MA 01876