
Installing a pergola on pavers is one of the most popular backyard upgrades homeowners tackle — and one of the most commonly done wrong.
Here’s the quick answer most people need:
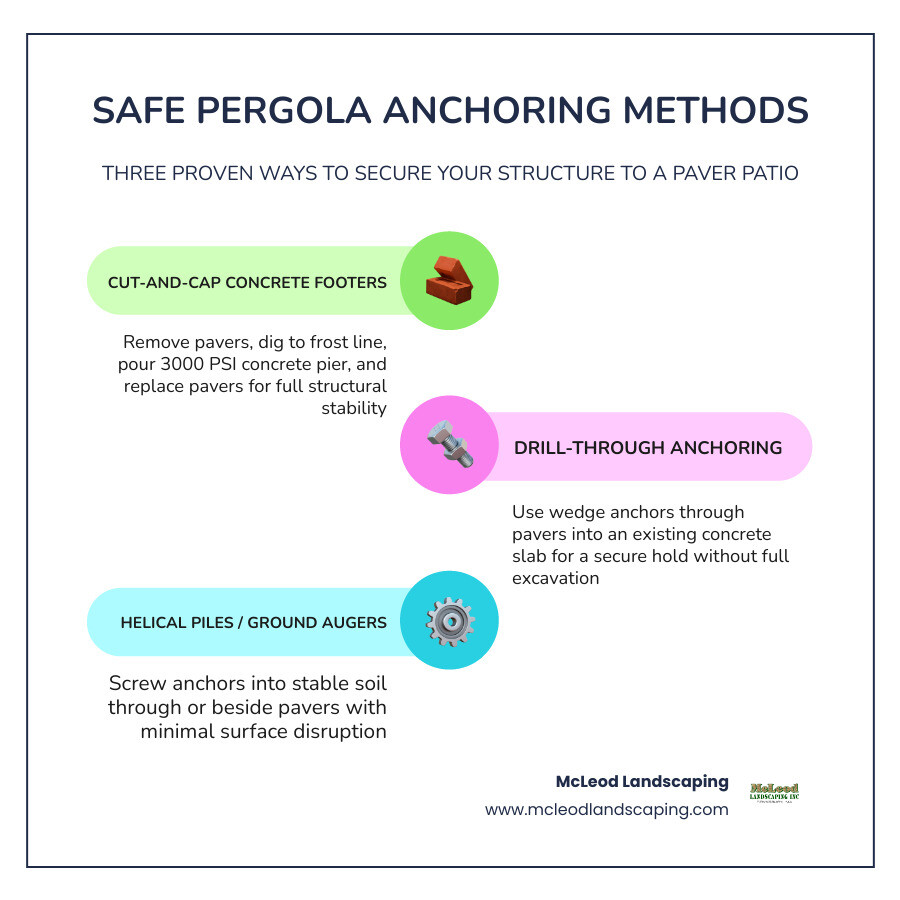
You cannot safely anchor a pergola directly to pavers. Pavers are a floating surface. They sit on sand and gravel, not solid ground. To install a pergola that is safe and code-compliant, you need one of these three proven anchoring methods:
Each method suits a different situation. The right one depends on your climate, your pergola’s size and weight, and what’s under your pavers. We’ll cover all three in detail below.
Pavers look solid, but they move. Freeze-thaw cycles, settling sand beds, and wind loads can all shift a poorly anchored pergola — or worse, topple it entirely. Larger wooden pergola designs can weigh anywhere from 300 to 600 lbs, and that’s before adding accessories. A single glass wall panel can add up to 763 lbs of additional load. That kind of weight and wind exposure demands a real foundation, not just a surface attachment.
I’m Scott McLeod, owner of McLeod Landscaping Inc., and I’ve spent over 30 years designing and building hardscaping projects — including installing pergolas on pavers — for homeowners and commercial properties across the Merrimack Valley. In this guide, I’ll walk you through exactly what works, what fails, and how to get it done right the first time.
Installing a pergola on pavers glossary:
If you take away only one lesson from this guide, let it be this: never bolt a heavy, wind-catching structure directly to loose patio stones.
Many well-meaning DIYers believe that because a backyard paver walkway or patio feels solid underfoot, it can handle the structural demands of a pergola. But there is a massive difference between supporting downward foot traffic and resisting the dynamic, upward forces of a windstorm.

For a step-by-step breakdown of basic anchoring concepts, check out this guide on How to Anchor a Pergola to Pavers. To understand why this goes wrong on a physical level, we have to look at how patios are built.
A standard patio is made of loose masonry units laid over a flexible base. When we perform concrete pavers installation services, we lay down a compacted gravel sub-base, a thin sand leveling bed, and then place the paver stones on top, locking them in with polymeric sand.
This creates a beautiful, flexible, “floating” surface designed to shed water and move slightly with the earth. However, because these stones are not bound together or glued to the ground, they have virtually zero resistance to vertical uplift.
If you bolt a pergola post bracket directly to a single 2-inch thick concrete paver, that paver is the only thing holding that corner of your pergola down. If a strong gust of wind gets under the roof, it doesn’t just lift the pergola — it easily pulls that individual paver right out of its sand bed. The result is structural failure, shattered wood or aluminum, and a serious safety hazard in your backyard.
Furthermore, drilling directly into a paver without a solid foundation beneath it concentrates all of the pergola’s lateral weight and movement onto a small piece of concrete. This localized stress leads to rapid cracking, shifting, and a ruined patio.
To build a structure that lasts, we have to design for two major environmental forces: wind uplift and frost heave.
To prevent these forces from destroying your investment, you must anchor your pergola to something permanent and deep.
Now that we know why surface-anchoring fails, let’s look at the three industry-proven methods to do it right. The following table compares these techniques to help you decide which is best for your patio:
| Feature/Consideration | Method 1: Cut-and-Cap Footers | Method 2: Slab Anchoring | Method 3: Helical Piles |
|---|---|---|---|
| Best For | Heavy wood/steel pergolas, cold climates, new or existing patios | Patios built over an existing concrete pad | Heavy pergolas where you want to minimize digging |
| Structural Integrity | Excellent (Gold Standard) | Excellent (Requires $ge$ 4″ concrete) | Very Good to Excellent |
| Disruption to Patio | Moderate (Requires removing/cutting a few pavers) | Low (Requires drilling through pavers) | Low (Requires removing/cutting a few pavers) |
| Frost Protection | Yes (When dug below 40″ frost line) | Yes (If the slab is frost-protected) | Yes (Piles are driven deep into stable soil) |
| DIY Friendliness | Moderate (Requires digging and pouring concrete) | High (Requires a hammer drill and wedge anchors) | Low (Requires specialized equipment or heavy augers) |
This is the absolute gold standard for installing a pergola on pavers. If you are building a heavy, custom timber structure or live in an area prone to harsh winters, this is the method we recommend. It physically isolates the structural load of the pergola from the floating patio stones.
Here is how the process works:
This “cut-and-cap” method ensures that the weight of your pergola sits directly on solid concrete piers that extend deep into stable earth, preventing any shifting from frost or wind. For general guidance on preparing post footings, you can refer to the How to Build a Pergola: Post Footings guide.
If your paver patio was built over an existing concrete driveway, reinforced pool deck, or a poured concrete pad, you are in luck! This is one of the easiest ways to secure your structure.
This method involves drilling directly through the pavers, passing through the sand bed, and anchoring deep into the solid concrete slab beneath. For a visual of how these layers interact, you can read about Installing Patio Pavers.
To execute this safely, your concrete slab must be at least 4 inches thick, uncracked, and structurally sound. You will need heavy-duty, 5-inch-long wedge anchors (such as Redhead wedge anchors) that are rated for structural loads. The anchor must embed at least 1.5 to 2.5 inches into the solid concrete beneath the sand bed.
This method is incredibly strong and keeps your patio surface completely intact, though it does require precision drilling to avoid cracking your paver stones.
If you want the structural strength of a deep concrete pier but hate the idea of digging massive holes and mixing bags of concrete, helical piles (also known as ground screw anchors) are an excellent alternative.
These are large, galvanized steel screws that are driven deep into the ground using high-torque hydraulic equipment or a heavy-duty impact wrench.
To use this method on an existing patio, you only need to remove a single paver at each post location. The helical pile is screwed directly through the open space deep into the stable subsoil (often 36 to 48 inches deep). Once the pile is fully driven, a steel bracket is attached to the top, and the post is mounted directly to it.
This method is fast, incredibly resistant to wind uplift, and causes minimal disruption to your paver landscaping.
Attempting this project with standard household tools is a recipe for frustration and broken drill bits. Before you begin, make sure you have the following gear ready:

The number one complaint among DIYers when installing a pergola on pavers is cracked stones. Concrete and clay pavers are incredibly strong under compression, but they are brittle. If you drill too fast, apply too much pressure, or use the wrong technique, they will split.
Here is how we prevent cracking on our professional hardscaping jobs:
Before you head to the home improvement store or order a custom pergola kit, there are a few legal and financial realities to consider.
First, check your local building codes. In most Merrimack Valley municipalities — including Lowell, Burlington, and Wilmington — any permanent backyard structure over a certain size (often 100 to 120 square feet) requires a building permit.
Additionally, municipal codes enforce strict setback requirements. For example, your pergola may need to be at least 3 to 5 feet away from your property lines. Building without a permit can result in hefty fines, and you may be forced to tear down your beautiful new structure if it violates local zoning laws.
Building a pergola is a fantastic weekend project for two capable DIYers, but it is physically demanding and requires precise layout and drilling skills. Here is a realistic look at what you can expect to spend:
While a DIY build can save you money on labor, a professional installation typically takes just 1 to 2 days, compared to the 2 to 3 weekends it often takes a homeowner to complete the project.
No. While using large, soil-filled planters as ballast is a popular “hack” on social media, it is structurally insufficient for anything other than very light, temporary metal arches. A standard wood or aluminum pergola can easily generate thousands of pounds of uplift during a severe storm. Planters do not provide a mechanical connection to the earth, meaning your pergola can still tip over, dragging the heavy planters with it and creating an even more dangerous safety hazard.
In the Merrimack Valley (including Andover, Billerica, and Carlisle, MA), concrete footings must be dug to a minimum depth of 40 inches to get below the local frost line. This prevents frost heave from lifting and warping your structure during our freezing winters. Always check with your local building department to verify the exact frost depth requirements for your specific town.
In most cases, yes. Because a pergola is a permanent outdoor structure, most local building departments require a permit to ensure it meets structural wind-load requirements and complies with local property setback rules. Always contact your local town hall before starting construction to avoid costly code violations.
Installing a pergola on pavers is a beautiful way to elevate your outdoor space, creating a shaded retreat for family dinners, weekend barbecues, or quiet evenings by the fire. However, because pavers are a floating surface, skipping the foundation and bolting directly to the stones is a shortcut that always ends in cracked pavers, warped frames, or structural failure.
By using proven methods like cut-and-cap concrete footers, drill-through slab anchoring, or helical piles, you can ensure your pergola remains safe, stable, and stunning for decades to come.
If you want to transform your backyard without the stress of heavy digging, precise masonry cutting, and navigating local building permits, we are here to help. At McLeod Landscaping, we have over 30 years of experience providing professional hardscaping and Patio Installation Services across Tewksbury, Wilmington, Billerica, and the surrounding Merrimack Valley.
Contact us today to schedule an on-site consultation, and let’s build the outdoor living space of your dreams!
Contact McLeod Landscaping today at (978) 640-0957 or click here to schedule a consultation for retaining wall installation. Let our experienced team design and install a functional and visually appealing retaining wall that enhances your landscape.


1881 Main St Unit 1, Tewksbury, MA 01876